Amazon Web Services (AWS) Cloud Development Kit (CDK) is a powerful tool for defining cloud infrastructure as code. With AWS CDK, you can easily provision AWS resources like Amazon EC2 instances using programming languages like TypeScript. In this article, we’ll walk through the steps to create and run an EC2 instance using AWS CDK in TypeScript.
Prerequisites
Before you begin, make sure you have the following prerequisites in place:
- AWS Account: You need an AWS account. If you don’t have one, you can create an AWS account for free.
- AWS CDK: Install the AWS CDK toolkit by running:
npm install -g aws-cdk- Node.js and TypeScript: You should have Node.js and TypeScript installed on your development machine.
Step 1: Set Up Your CDK Application
Let’s start by creating a new CDK application. In your terminal, run the following commands:
mkdir ec2-cdk-app
cd ec2-cdk-app
cdk init app --language=typescript
This will set up a new CDK app in the ec2-cdk-app directory with TypeScript as the programming language.
Step 2: Define an EC2 Instance
Now, let’s define an EC2 instance in your CDK application. Open the lib/ec2-cdk-app-stack.ts file in your favorite code editor, and modify it to look like this:
import * as cdk from 'aws-cdk-lib';
import * as ec2 from 'aws-cdk-lib/aws-ec2';
import * as iam from 'aws-cdk-lib/aws-iam';
import { Construct } from 'constructs';

export class Ec2CdkAppStack extends cdk.Stack {
  constructor(scope: Construct, id: string, props?: cdk.StackProps) {
    super(scope, id, props);

    // Create a VPC
    const vpc = new ec2.Vpc(this, 'MyVPC', {
      maxAzs: 3, // Use 3 Availability Zones
    });

    // Create an EC2 instance
    const instance = new ec2.Instance(this, 'MyInstance', {
      instanceType: ec2.InstanceType.of(
        ec2.InstanceClass.BURSTABLE3,
        ec2.InstanceSize.MICRO
        ),
      machineImage: new ec2.AmazonLinuxImage({
        generation: ec2.AmazonLinuxGeneration.AMAZON_LINUX_2
      }),
      vpc: vpc, // Attach to the VPC
    });

    // Attach SSM managed instance policy, so we can connect to it with SSM
    const ssmManagedPolicy = iam.ManagedPolicy.fromAwsManagedPolicyName(
      'AmazonSSMManagedInstanceCore',
    );
    instance.role.addManagedPolicy(ssmManagedPolicy);

  }
}

const app = new cdk.App();
new Ec2CdkAppStack(app, 'Ec2CdkAppStack');
In this code, we create an Amazon EC2 instance and associate it with a new VPC. We’re using a simple Amazon Linux image for the instance.
Step 3: Deploy Your CDK Application
Now, let’s deploy your CDK application to AWS. Run the following command from ec2-cdk-app directory:
cdk deployCDK will create the necessary AWS resources, including the EC2 instance and the VPC. You will be prompted to confirm the deployment; type “y” and press Enter.
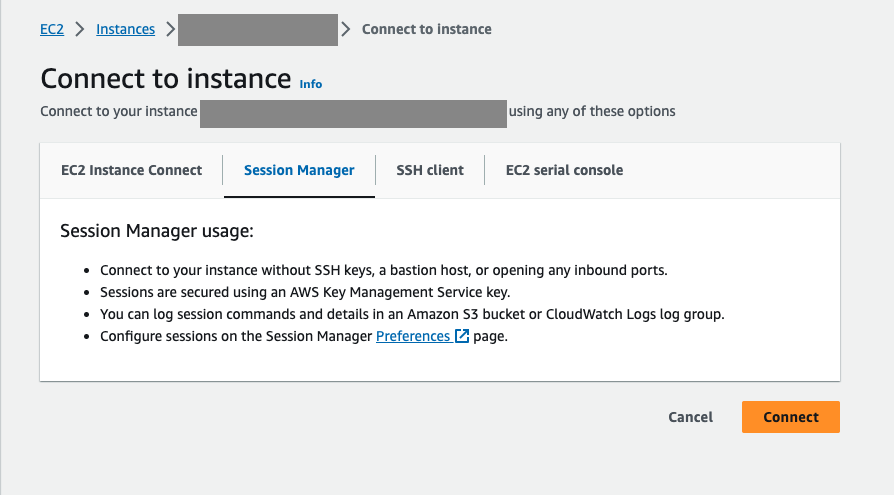
Step 4: Access Your EC2 Instance with Session Manager
Login to AWS console, select your instance from the list and press “Connect”, choose Session Manager tab and press “Connect” again:
Step 5: Clean Up
Don’t forget to clean up your resources when you’re done to avoid unnecessary charges. Run the following command to delete the stack:
cdk destroyConclusion
In this article, we’ve walked through the steps to create and run an EC2 instance using AWS CDK in TypeScript. AWS CDK makes it easy to define and manage AWS resources programmatically, providing a powerful way to manage your cloud infrastructure. Now you can continue to explore AWS CDK and build more complex infrastructure as code with ease.